How Do I Change the Status of an Event?

Development, Admissions, Registrar, Finance, and Library Module
Knowledge Base 2.0 article 391
How Do I Change the Status of an Event?
Navigation Path
Tool Bar → Planned Events → Event Directory → Edit

Explanation
The Tool Bar is located on the upper left taskbar next to oasisSIS. Click on “≡” and then scroll down.
Click on “Planned Events” and then on “Event Directory.”
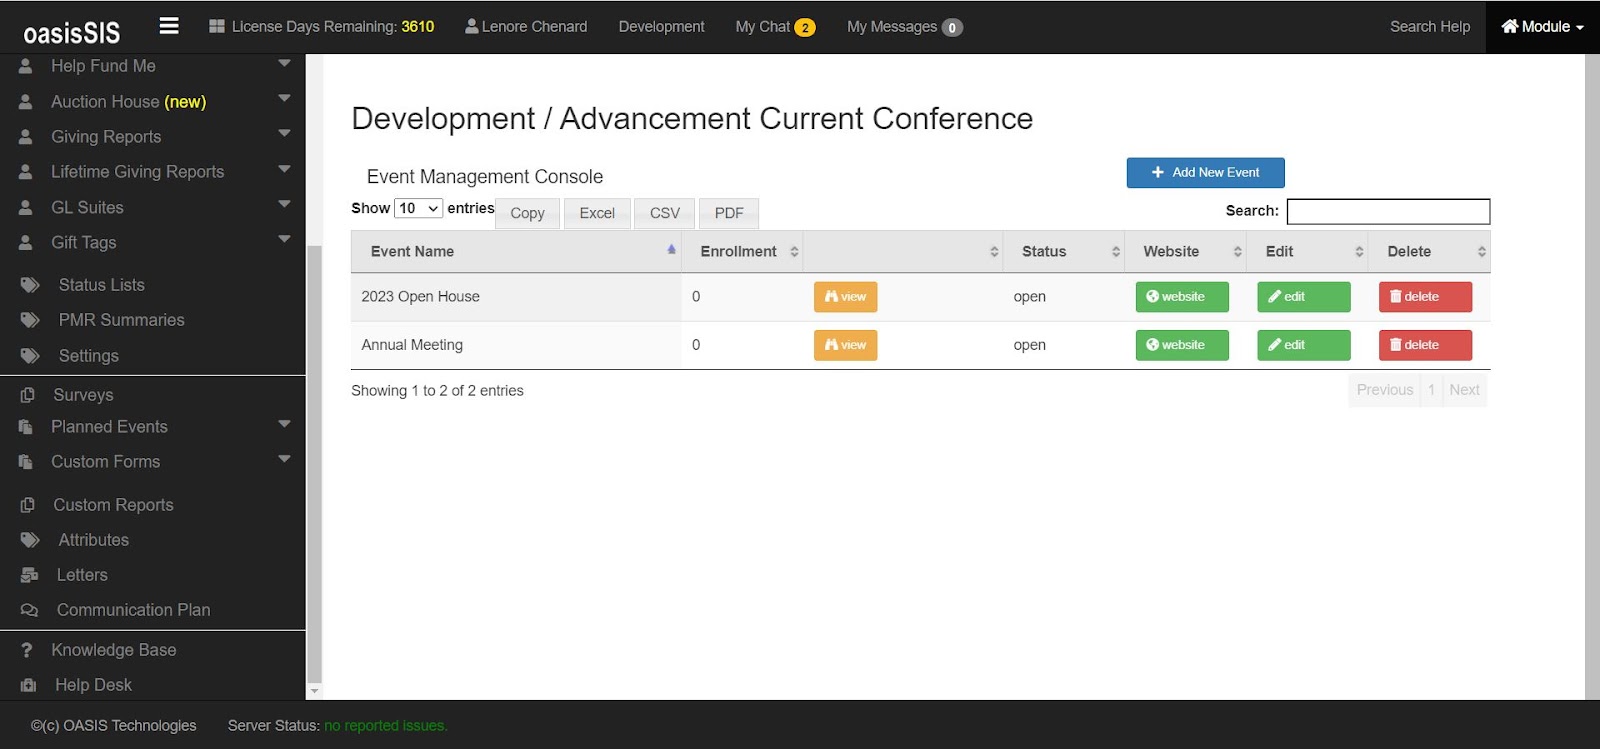
From here you will see all your events.
To change the status of an event, click on the gree edit button next to your event.

Under “Event Status” click the drop down box and select your desired status. A green check mark will appear on the far right hand side indicating a saved change. Click the white “X” in the top right hand corner.
You have successfully changed the event status.