College Web Page
College Web Page

A: Under Navigation go to "System Administrator"
B: Click on "Settings"
C: Click on "Web Page"
D: Click on "Building Institution's Info sheet"

E: Click on "About"
- There is no work to be done here. The "About" Section is informing you of your ability to share your
web page on social media. This page will NOT be seen by users.

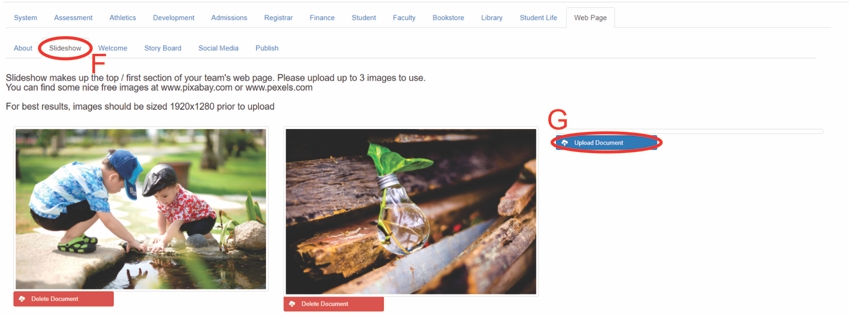
F: Click on "Slideshow"
G: Click on "Upload Document" (Repeat up to 3 pictures)
- Click browse
- Select Picture
- Click OK
- Click the white X
- Click the green refresh button

H: Click on "Welcome"
I: Click on "Upload Document"
- Click browse
- Select Picture
- Click OK
- Click the white X
- Click the green refresh button
J: Type in Welcome
K: Click on "Save Welcome"

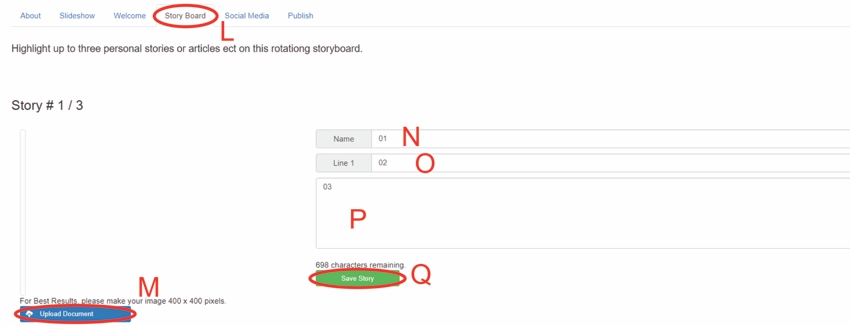
L: Click on "Story Board"
M: Click on "Upload Document"
- Click browse
- Select Picture
- Click OK
- Click the white X
- Click the green refresh button
N: Type in Name
O: Type in subject of a quote
P: Type in Story
Q: Click on "Save story"

R: Any social media that your school has can be used to promote your web page.
- If your school does not have a twitter for example then delete the twitter URL

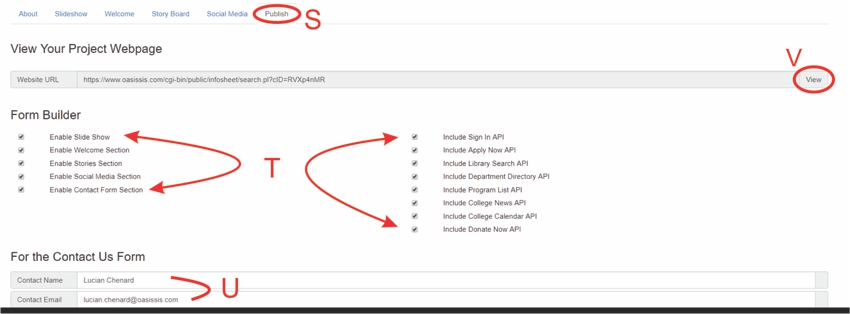
S: Click on "Publish"
T: Click on boxes to enable/disable what shows up on your website
U: Type in school's contact information
V: Click on "View"
- This will take you to your schools website
All articles in the Knowledge Base have been submitted by one of our users, from one of our member schools (colleges / universities).
If you would like to become a Knowledge Base contributor please contact us through the Help Desk and let us know of your interest.

(c) 2018 Oasis Technologies | Orlando, Florida USA